Do you really want to start a WordPress blog in a year 2024? Yes, then go with WordPress since this is the best open source platform to start your personal blog or website. As you can also start with free hosted options like WordPress.com or Blogger.com, but you will get the most control by creating self-hosted WordPress blog.
WordPress is also an easy to use, fast and very flexible. It comes with some great features to make your experience as blogger as much pleasant as possible.
Also, read:
So in this article we will provide you with detailed instructions on how to start a WordPress blog without any hassle. Here we will cover up everything in (30 minute) step by step to choose domain name, web hosting service, install WordPress and other things needed for successful WordPress blog.
What you need to start a WordPress blog?
There are few things that you need to create a WordPress blog:
- A domain name (This will be the name of your blog i.e webdamn.com)
- A web hosting account (This is where your blog files stored to run on the internet)
- And the most important this is your attention for 30 minutes to cover each steps.
In this tutorial, we will cover following:
- How to Register a Domain Name
- How to Choose the Best Web Hosting
- How to Install WordPress
- How to Choose Best Theme for Your Blog
- How to Choose Must Have WordPress Plugin
- How to Create Your First Post in WordPress Blog
so if you’re ready? Let’s started.
1. Choose a Domain Name and Web Hosting
The first thing to start your WordPress blog is domain name. A domain name is the address of your blog on web to find your blog like webdamn.com. Try to choose short, easy to pronounce and brand able domain name for your blog because domain name is the first impression to blog visitors. Its also defines your brand and effects search rankings.
As the domain name costs around $10 to $15 per year, so its too much for beginners who just thinking to start. The web hosting also costs around $3 to $8 per month and many web hosting services offering free domain name registration when buy web hosting.
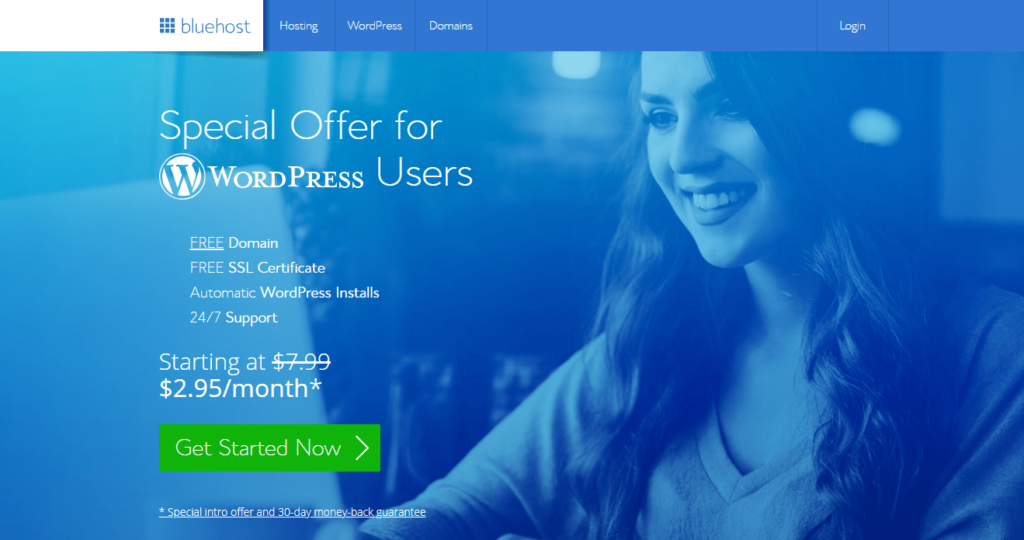
The Bluehost web service is the best for WordPress as they provide one click WordPress installation and their starting web hosting price is very low per month with free domain name and free SSL.
We will recommend Bluehost web hosting because it is the best and we are already using this. The Bluehost provide excellent web hosting services with easy control panel to manage websites and technical support.
So now we will go ahead to purchase domain name and web hosting on Bluehost.
First go to Bluehost WordPress Hosting and click on the green Get Started Now button to get started.
Now choose your web hosting plan according to your needs. I will recommend you to choose 36 month plan as it ads more dicscount.
After web hosting plan selection, it will ask for domain name for your blog or website. Enter your new doman name that you have chosen to start your blog.

Then click Next to complete your order.
After completing your order, you will receive an email regarding your Bluehost control panel login details to manage your website.
2. How to Install One Click WordPress on Bluehost
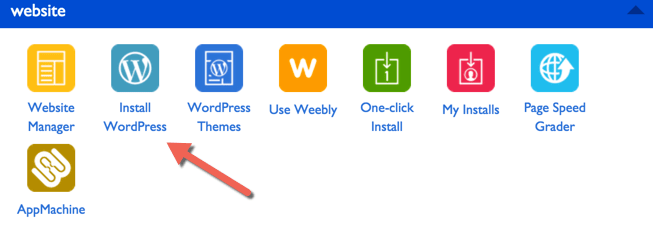
Login to your Bluehost web hosting account and go to control panel, you will see a small icon Install WordPress under Website section for One Click WordPress Installation on Bluehost. You need to click this icon.
You will be redirected to Bluehost One Click WordPress install screen. You need to click on Install button. On the next screen, you will be asked to select your domain name. Choose the domain from the drop-down and then click Next button.
After that, you need to enter your website details like website name, username and password. You also need to check all the check-boxes and then click Install.
The WordPress will start installing and you will also be asked to browse WordPress themes for your blog during WordPress installation. You can skip theme selection as this can be managed later.
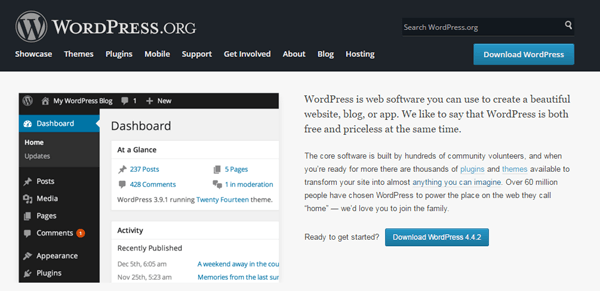
After sometime, WordPress get installed and you will see success message. Just click installation complete link, and it will take you to the screen with your WordPress website login URL with login details.
Congratulations, now your WordPress website installed successfully.
3. How to Install WordPress Manually
Here we will provide you with detailed and easy steps to install WordPress on your web hosting server. You just need to follow these easy steps to perform a manual installation of the latest WordPress.
1. Download the latest WordPress installation package
To start with the installation, you need to download latest WordPress from its official download page.
When you click on the download button, it will automatically download the latest WordPress version as compressed ZIP file on your computer hard disk. Now you need to extract download package files to a new folder to process with file upload to server in step2.
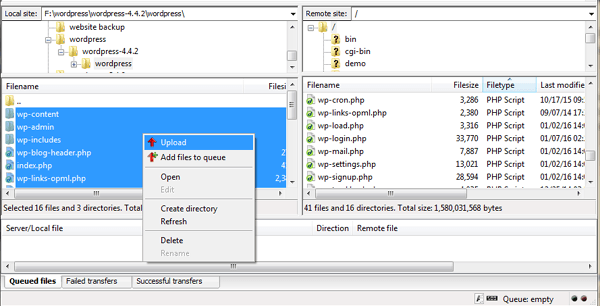
2. Upload WordPress Files to Web Server
Now you need to upload the extracted WordPress package files and folders to your web server. For this, you can use FTP software such as FileZilla, WinSCP or SmartFTP to upload files on your web server using FTP login details. You can also upload files directly via your web hosting cPanel -> File Manager -> Upload file(s) by directly login to your web hosting control panel.
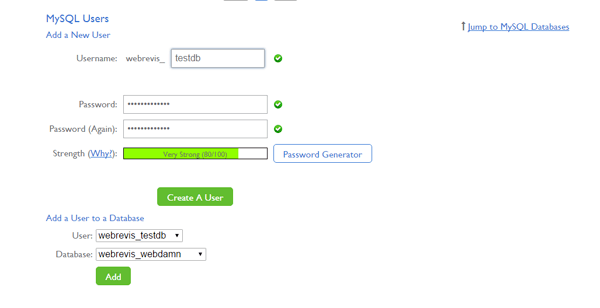
3. Create a MySQL Database for WordPress
Now, you need to create a MySQL database by going through your web hosting “MySQL Databases” section. Then create a user and assign a user to created database with full privileges. When you have created your MySQL Database and User, make sure you write down the created database name, database username and password. You will need those for the installation process.
4. Now go through the installation process
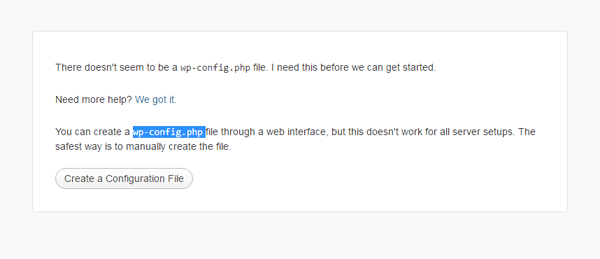
After creating MySQL database for your blog, now it’s time to navigate your website to start with the installation process. Suppose if you have uploaded your blog files in your web hosting public_html directory then you will need to go to http://yourdomain.com in your browser. At very first, a message will be displayed, telling you that you don’t have a wp-config.php file and you should create one. You just need to click on the Create a Configuration File button to proceed.
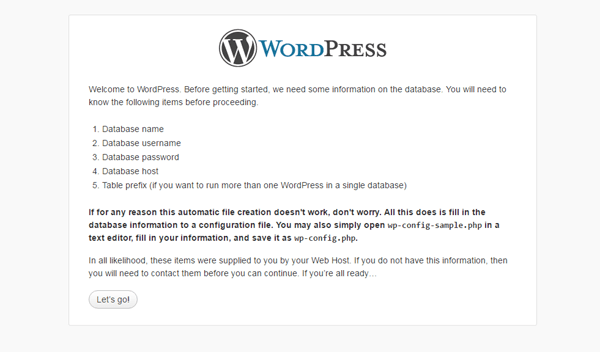
You will see a message on this page, asking you to get ready with the necessary information for the installation. Since you have already had this information, just press the Let’s Go button.
On this page you need to enter the details of your newly created MySQL database and press the Submit button

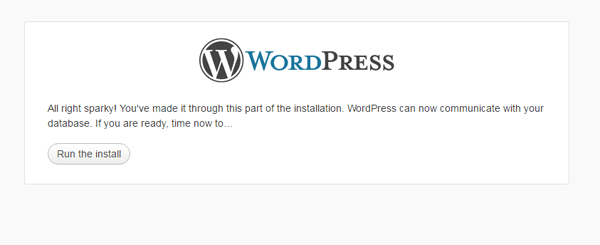
Now WordPress will check your provided MySQL database details. If you have provided correct necessary information, you will see a confirmation screen. Now press the Run the Install button to proceed.
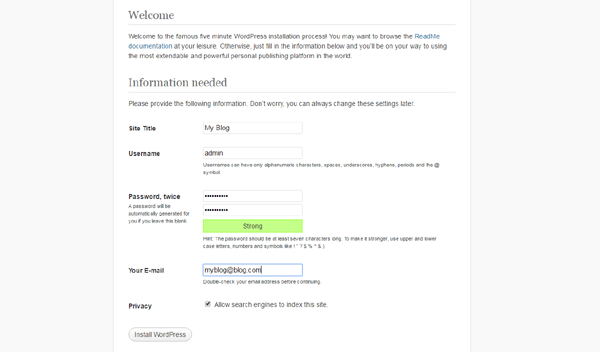
On this page you will have to enter the information about your administrative username, email address and the title of your newly created website. In addition, you can also specify whether you want search engines to index your website or not. Once you fill up with that information, press the Install WordPress button.
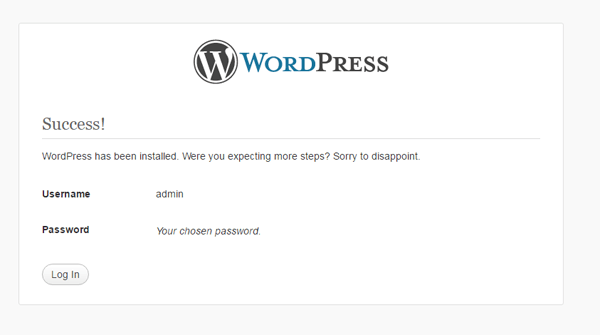
THAT’S IT! Now your new WordPress website is successfully installed. You can use the Log In button to access your administrative back-end and start posting in your newly created WordPress website.
4. Choose WordPress Theme for Your Blog
After successful WordPress install, your blog have default WordPress theme. So now you need to install your own theme to blog to give professional look. You need to go to Appearance=>Themes section in your blog Admin area to install new themes.
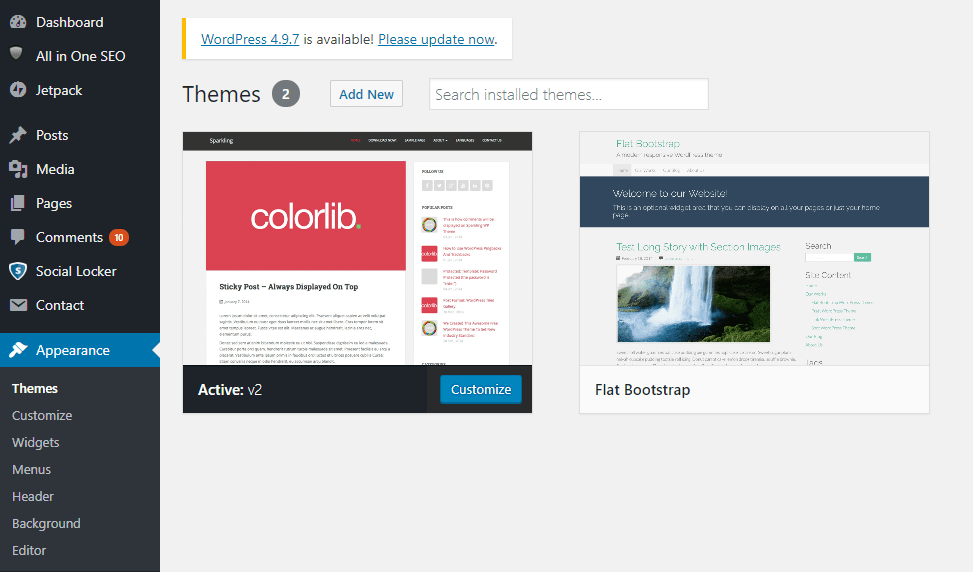
You need to click Add New button to install new themes. You will see screen with Upload Theme button to upload your own theme.
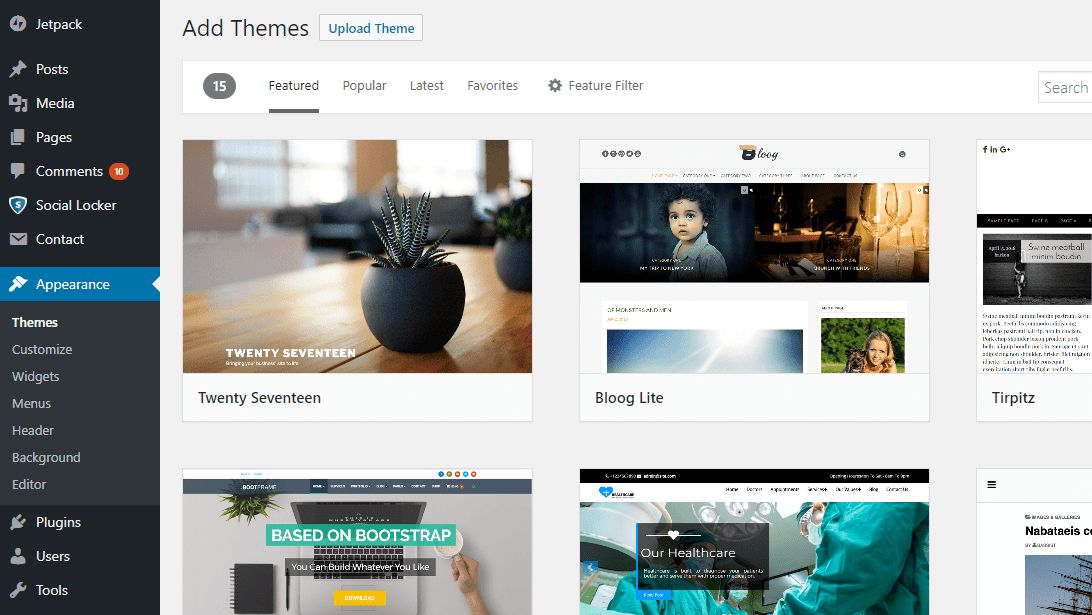
You will also see list of free WordPress themes to install by choosing right WordPress theme for your blog and activate it. You can also customize active theme by clicking customize theme button.
5. Install WordPress Plguins
You also need to install some must have WordPress plugin in your blog like Search engine optimization, Caching, Google XML Sitemaps etc to work it perfectly. You also need to create SEO friendly URL in WordPress to rank your blog in search engines.
6. Creating Your First Post in WordPress Blog
Now finally you can write your first post in WordPress blog. You need to go to Posts=>Add New section in Admin area. You will see a below screen to compose your post with title and content.
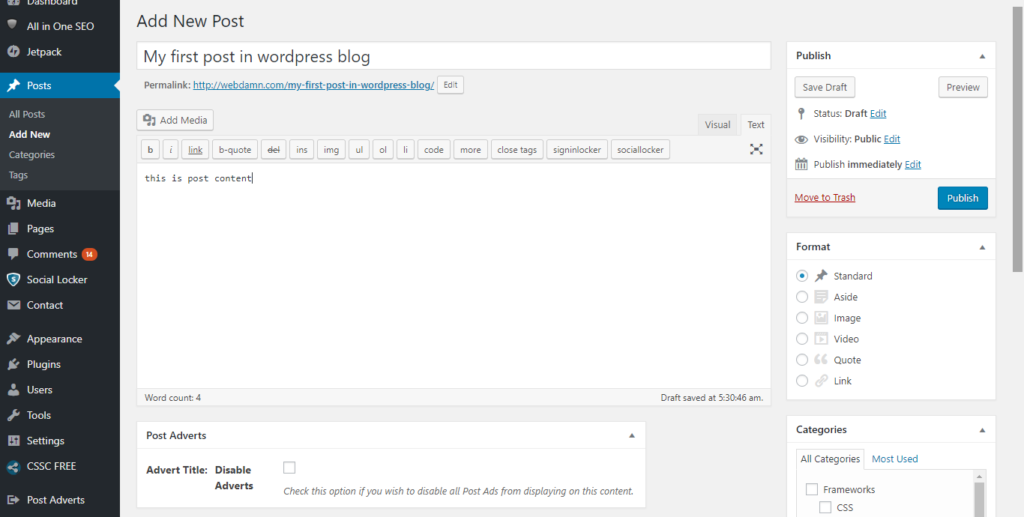
After you have completed your post, you just need to click Publish button to publish your post and the post will started displaying to your readers in your blog. You can also save post as Draft by clicking Draft button.
Congratulations! you have started your own WordPress blog successfully.
You may also like: