CodeIgniter is the most popular PHP framework that provides MVC platform to develop web applications. As a PHP developer, you have definitely implemented Multiple Image Upload with PHP. You can also implement multiple image upload in CodeIgniter.
So if you’re thinking about implementing Multiple Image Upload in CodeIgniter, then you’re here at right place. In this tutorial, you will learn how to implement multiple image upload using CodeIgniter framework.
We will cover this tutorial in easy steps with live demo to upload multiple images in CodeIgniter framework and you can also download source code of live demo to use in your projects.
Also, read:
- CodeIgniter Tutorial for Beginners
- Ajax Pagination in CodeIgniter with Example
- Form Validation in CodeIgniter with Example
- Ajax CRUD Operation in CodeIgniter with Example
- Export Data to Excel with PhpSpreadsheet using CodeIgniter
- DataTables Add Edit Delete with CodeIgniter
- Create RESTful API using CodeIgniter
As CodeIgniter has File Uploading Class to upload files, so we will use this class to develop example script to upload multiple files to server and also insert uploaded files details into MySQL database. In the example multiple file upload script, we will display a file upload form where the user can able to choose multiple files at once. When Upload button is clicked, all files would be uploaded to the server and files details would be inserted into the MySQL database table.
We hope that you have setup your CodeIgniter project and also set database connection details to connect with your MySQL database to use with this example. So let’s start.
Create MySQL Database Table
First we will create a table called gallery to store the uploaded files details into MySQL database. Create table using below query.
CREATE TABLE IF NOT EXISTS `gallery` (
  `id` int(11) NOT NULL AUTO_INCREMENT,
  `image` varchar(255) COLLATE utf8_unicode_ci NOT NULL,
  `created` datetime NOT NULL,
  `modified` datetime NOT NULL,
  PRIMARY KEY (`id`)
) ENGINE=InnoDB;
Create Directory To Upload Files
We will create a directory on the server to keep the uploaded files. In this tutorial, we will create directory uploads/files in the root folder of the application.
Create Controller For Files Upload
Now we will create controller Files_Upload.php in application/controllers. We will load Files model in __construct() and in index(), we will handle file uploading using file uploading libraray to the server and into MySQL database table gallery using Files model.
<?php defined('BASEPATH') OR exit('No direct script access allowed');
class Files_Upload extends CI_Controller {
    function  __construct() {
        parent::__construct();
        $this->load->model('files');
    }
    function index(){
        $data = array();
        if($this->input->post('submitForm') && !empty($_FILES['upload_Files']['name'])){
            $filesCount = count($_FILES['upload_Files']['name']);
            for($i = 0; $i < $filesCount; $i++){ $_FILES['upload_File']['name'] = $_FILES['upload_Files']['name'][$i]; $_FILES['upload_File']['type'] = $_FILES['upload_Files']['type'][$i]; $_FILES['upload_File']['tmp_name'] = $_FILES['upload_Files']['tmp_name'][$i]; $_FILES['upload_File']['error'] = $_FILES['upload_Files']['error'][$i]; $_FILES['upload_File']['size'] = $_FILES['upload_Files']['size'][$i]; $uploadPath = 'uploads/files/'; $config['upload_path'] = $uploadPath; $config['allowed_types'] = 'gif|jpg|png'; $this->load->library('upload', $config);
                $this->upload->initialize($config);
                if($this->upload->do_upload('upload_File')){
                    $fileData = $this->upload->data();
                    $uploadData[$i]['file_name'] = $fileData['file_name'];
                    $uploadData[$i]['created'] = date("Y-m-d H:i:s");
                    $uploadData[$i]['modified'] = date("Y-m-d H:i:s");
                }
            }
            if(!empty($uploadData)){
                //Insert file information into the database
                $insert = $this->files->insert($uploadData);
                $statusMsg = $insert?'Files uploaded successfully.':'Some problem occurred, please try again.';
                $this->session->set_flashdata('statusMsg',$statusMsg);
            }
        }
        //Get files data from database
        $data['gallery'] = $this->files->getRows();
        //Pass the files data to view
        $this->load->view('files_upload/index', $data);
    }
}
Create Files Model
Now we will create Files.php model in application/models. The model have two functions insert() and getRows(). The getRows() function used to get the file details from the database while insert() functioon used to insert uploaded files details into database.
<?php if ( ! defined('BASEPATH')) exit('No direct script access allowed');
class Files extends CI_Model {
    public function getRows($id = ''){
        $this->db->select('id,file_name,created');
        $this->db->from('gallery');
        if($id){
            $this->db->where('id',$id);
            $query = $this->db->get();
            $result = $query->row_array();
        }else{
            $this->db->order_by('created','desc');
            $query = $this->db->get();
            $result = $query->result_array();
        }
        return !empty($result)?$result:false;
    }
    public function insert($data = array()){
        $insert = $this->db->insert_batch('gallery',$data);
        return $insert?true:false;
    }
}
Create Upload Files Views
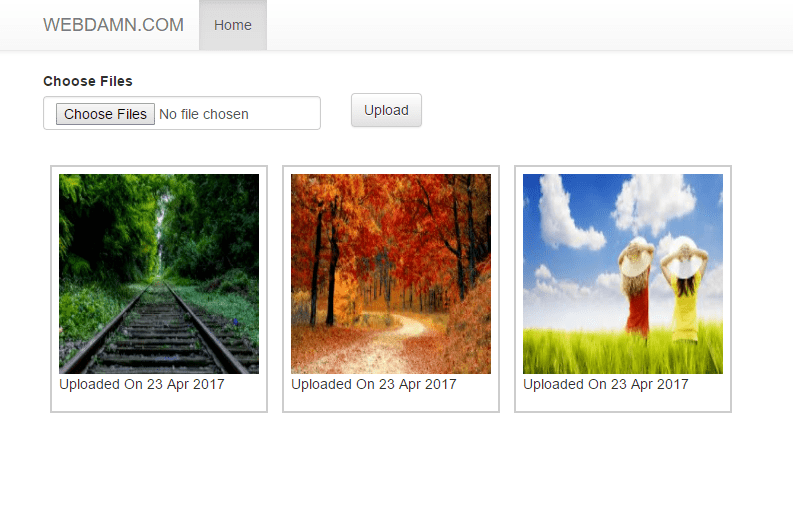
Now we will create files_upload/index.php in application/views. Using view file, we will display multiple file upload form with submit button. When form submitted, the uploaded files displayed under upload form.
<div class="container">
	<div class="row ">
		<form enctype="multipart/form-data" action="" method="post">
		<div class="form-group  col-sm-3">
			<label>Choose Files</label>
			<input type="file" class="form-control" name="upload_Files[]" multiple/>
		</div>
		<div class="form-group  col-sm-6">
			<input  type="submit" class="btn btn-default" name="submitForm" id="submitForm"/>
		</div>
	</div>
	<div class="row ">
		<p><?php echo $this->session->flashdata('statusMsg'); ?></p>
	</div>
    <div class="row">
		<div class="gallery">
			<ul>
				<?php if(!empty($gallery)): foreach($gallery as $file): ?>
				<li>
					<img src="<?php echo base_url('uploads/files/'.$file['file_name']); ?>" alt="" >
					<p>Uploaded On <?php echo date("j M Y",strtotime($file['created'])); ?></p>
				</li>
				<?php endforeach; else: ?>
				<p>No File uploaded.....</p>
				<?php endif; ?>
			</ul>
		</div>
    </div>
</div>
Configure Auto-load
Finally we will have to load some system library and helper for this example script. So open the config/autoload.php file and specify the library session,database and for the helper specify url to used in this application.
$autoload['libraries'] = array('session','database');
$autoload['helper'] = array('url');
After setting $config['base_url'] = 'http://localhost/multiple-file-upload-in-codeigniter'; in config/config.php and $route['default_controller'] = 'files_upload/index' in config/route.php, we will access application through URL http://localhost/multiple-file-upload-in-codeigniter/, the file uploading form and uploaded files in gallery display like below screen.

You may also like:
- User Management System with PHP & MySQL
- Datatables Add Edit Delete with Ajax, PHP & MySQL
- Build Helpdesk System with jQuery, PHP & MySQL
- Build Online Voting System with PHP & MySQL
- School Management System with PHP & MySQL
- DataTables Add Edit Delete with CodeIgniter
- Create RESTful API using CodeIgniter
- Build Reusable Captcha Script with PHP
- Product Search Filtering using Ajax, PHP & MySQL
- Image Upload and Crop in Modal with jQuery, PHP & MySQL
- Build Push Notification System with PHP & MySQL
- Project Management System with PHP and MySQL
- Hospital Management System with PHP & MySQL
- Build Newsletter System with PHP and MySQL
- Skeleton Screen Loading Effect with Ajax and PHP
- Build Discussion Forum with PHP and MySQL
- Customer Relationship Management (CRM) System with PHP & MySQL
- Online Exam System with PHP & MySQL
- Expense Management System with PHP & MySQL
You can view the live demo from the Demo link and can download the script from the Download link below.
Demo Download
thank
where is the links for download this demo please
its at the end of tutorial. Thanks!
please how can i add delete features to it
You can add delete and handle delete by using id on click event.
thank for help …..after search 2 hours i found your link
Cool article buddy.