Sending Email is an important feature of web applications. The email send functionality is used to send notification emails to users. Generally emails are send with text details but sometimes we also need to send emails with file attachment.
So you’re thinking about implementing sending email with file attachment using PHP, then you’re at right place. In this tutorial you will learn how to implement Send Email with Attachment on Form Submission in PHP using PHPMailer library.
We will cover tutorial in easy steps with live example to create Bootstrap form with input validations and send email on form submission using PHP.
Also, read:
- Login with Remember Me using PHP & MySQL
- Build Login System with OTP using PHP & MySQL
- Login and Registration Script with PHP and MySQL
So let’s start implementing email send with attachment using PHP. Before we begin, take a look on files structure for this example.
- index.php
- validation.js
- email.php
Step1: Include jQuery, Bootstrap, Bootstrap Validation Plugin and CSS Files
As we will create HTML Form with Bootstrap, so first we will include Bootstrap and jQuery Files. We will also include bootstrapValidator plugin file to implement Form input validation and also other JavaScript and CSS files.
<script src="//cdnjs.cloudflare.com/ajax/libs/jquery/3.2.1/jquery.min.js"></script>
<link href="//maxcdn.bootstrapcdn.com/bootstrap/4.1.1/css/bootstrap.min.css" rel="stylesheet" id="bootstrap-css">
<script src="//maxcdn.bootstrapcdn.com/bootstrap/4.1.1/js/bootstrap.min.js"></script>
<script type="text/javascript" src="//cdnjs.cloudflare.com/ajax/libs/jquery.bootstrapvalidator/0.5.2/js/bootstrapValidator.min.js"></script>
<script src="js/validation.js"></script>
<link rel="stylesheet" href="css/style.css">
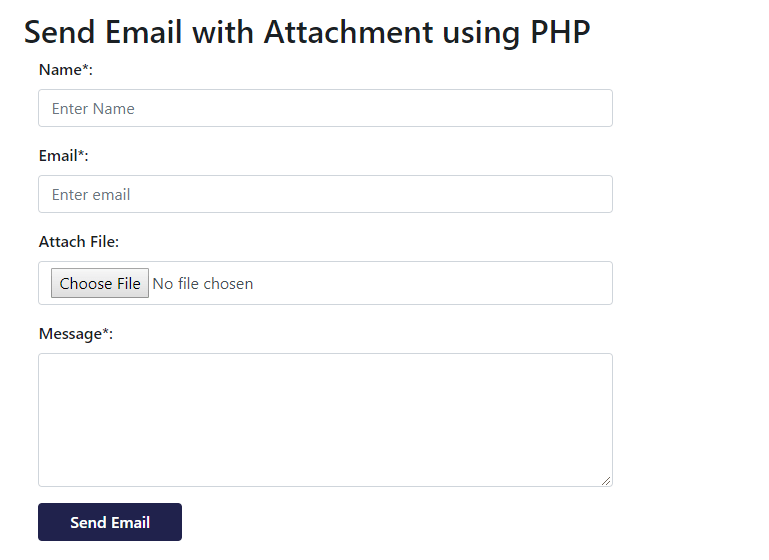
Step2: Create HTML Form with File Input Field
We will create HTML Form with Bootstrap with input fields in index.php file.
<form action="mail.php" method="post" id="emailForm" enctype="multipart/form-data">
	<div class="contact-form">
	<?php if(!empty($_GET['success']) && $_GET['success']) { ?>
		<div id="message" class="alert alert-danger alert-dismissible fade show">The message has been sent.</div>
	<?php } ?>
	<div class="form-group">
	  <label class="control-label col-sm-2" for="fname">Name*:</label>
	  <div class="col-sm-10">
		<input type="text" class="form-control" id="uname" name="uname" placeholder="Enter Name" >
	  </div>
	</div>
	<div class="form-group">
	  <label class="control-label col-sm-2" for="email">Email*:</label>
	  <div class="col-sm-10">
		<input type="email" class="form-control" id="email" name="email" placeholder="Enter email" >
	  </div>
	</div>
	<div class="form-group">
	  <label class="control-label col-sm-2" for="lname">Attach File:</label>
	  <div class="col-sm-10">
		<input type="file" class="form-control" id="attachFile" name="attachFile">
	  </div>
	</div>
	<div class="form-group">
	  <label class="control-label col-sm-2" for="comment">Message*:</label>
	  <div class="col-sm-10">
		<textarea class="form-control" rows="5" name="message" id="message"></textarea>
	  </div>
	</div>
	<div class="form-group">
	  <div class="col-sm-offset-2 col-sm-10">
		<button type="submit" class="btn btn-default" name="sendEmail">Send Email</button>
	  </div>
	</div>
	</div>
</form>
Step3: Implement Form Input Validation
In validation.js file, we will implement Form Input Validation using bootstrapValidator plugin. We will also validate file input field to allow only specific file type and size to attach with email.
$(document).ready(function() {
    $('#emailForm').bootstrapValidator({
        feedbackIcons: {
            valid: 'glyphicon glyphicon-ok',
            invalid: 'glyphicon glyphicon-remove',
            validating: 'glyphicon glyphicon-refresh'
        },
        fields: {
            uname: {
                validators: {
                        stringLength: {
                        min: 2,
                    },
                        notEmpty: {
                        message: 'Please enter your name'
                    }
                }
            },
            email: {
                validators: {
                    notEmpty: {
                        message: 'Please enter your email address'
                    },
                    emailAddress: {
                        message: 'Please enter a valid email address'
                    }
                }
            },
			attachFile: {
                validators: {
                    file: {
                        extension: 'jpeg,png,pdf,zip,gif,txt,doc',
                        type: 'image/jpeg,image/png,application/pdf,application/zip,image/gif,text/plain,application/msword',
                        maxSize: 2048 * 1024,
                        message: 'The selected file is not valid'
                    }
                }
            },
            message: {
                validators: {
                      stringLength: {
                        min: 10,
                        max: 200,
                        message:'Please enter at least 10 characters and no more than 200'
                    },
                    notEmpty: {
                        message: 'Please enter a message'
                    }
                }
            }
        }
    });
});
Step4: Implement Send Email with Attachment with PHPMailer
Now finally in mail.php file, we will implement email send functionality with attachment using PHPMailer library.
<?php
require 'PHPMailer/PHPMailerAutoload.php';
if($_POST['email']) {
	$name = $_POST['uname'];
	$toEmail = $_POST['email'];
	$message = $_POST['message'];
	try {
		$mail = new PHPMailer;
		$mail->AddAddress($toEmail);
		$mail->From = "admin@webdamn.com";
		$mail->Subject = "Email with attachment";
		$body = "<table>
			<tr>
			<th colspan='2'>This is a test email with attachment</th>
			</tr>
			<tr>
			<td>Name :</td>
			<td>".$name."</td>
			</tr>
			<tr>
			<td>Message : </td>
			<td>".$message."</td>
			</tr>
			<table>";
			$body = preg_replace('/\\\\/','', $body);
			$mail->MsgHTML($body);
			$mail->IsSendmail();
			$mail->AddReplyTo("admin@webdamn.com");
			$mail->AltBody = "To view the message, please use an HTML compatible email viewer!";
			$mail->WordWrap = 80;
			$mail->AddAttachment($_FILES['attachFile']['tmp_name'], $_FILES['attachFile']['name']);
			$mail->IsHTML(true);
			$mail->Send();
			header("Location: index.php?success=1");
	} catch (Exception $e) {
		echo "Message could not be sent. Mailer Error: {$mail->ErrorInfo}";
	}
}
?>
You may also like:
- User Management System with PHP & MySQL
- Datatables Add Edit Delete with Ajax, PHP & MySQL
- Build Helpdesk System with jQuery, PHP & MySQL
- Build Online Voting System with PHP & MySQL
- School Management System with PHP & MySQL
- DataTables Add Edit Delete with CodeIgniter
- Create RESTful API using CodeIgniter
- Build Reusable Captcha Script with PHP
- Product Search Filtering using Ajax, PHP & MySQL
- Image Upload and Crop in Modal with jQuery, PHP & MySQL
- Build Push Notification System with PHP & MySQL
- Project Management System with PHP and MySQL
- Hospital Management System with PHP & MySQL
- Build Newsletter System with PHP and MySQL
- Skeleton Screen Loading Effect with Ajax and PHP
- Build Discussion Forum with PHP and MySQL
- Customer Relationship Management (CRM) System with PHP & MySQL
- Online Exam System with PHP & MySQL
- Expense Management System with PHP & MySQL
You can view the live demo from the Demo link and can download the script from the Download link below.
Demo Download
This is a life saving form. Thank you.